So, as you know, I have been on my fair share of safaris. For hours in the back of a safari truck, I am sure few people out there even come close to comparing. The ones who do have these hours on a truck are either driving or tracking, or being hauled around doing major filming for big organizations like National Geographic. But for the regular traveller/photographer, you don’t often go on hundreds of safaris. But I did.
So, in all these experiences I have a few guidelines I follow. Its not an exact science by any means, but more of a general rule of thumb. If you find yourself on safari, keep this in mind. If you are on Solos Sister Safari or Rock n Roars Guided Safari – I will remind you!
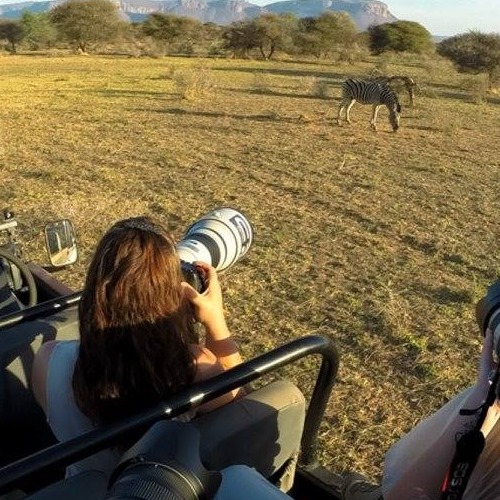
- You will never take a good photo or steady video handholding on a moving truck. No matter how much you want to, its likely not going to happen to your full satisfaction. Just use your phone which will give you way more control and enjoy the view. You probably won’t believe me, and that’s ok. Free to try right? But lets say you do, and when you open them up on a big screen you will likely see some level of blur. Why? Because these trucks are not gentle. The ground is not level. The jerking motion created in even the most eased in stops is too much for a big lens to handle – even with IS. And I am assuming if you need to take the photo before we have even stopped it is because it is something amazing which explains why you have a big lens on your camera. So maybe just be ready to fire when that last rebound in the truck is settled.
- Choose your settings before you ever get to a sighting if possible. This is especially important when an animal is hard to find or on the move. Unless you are being surprised by your guide in which case they might not warn you in advance. This is why you need Solo Sister Safari RnR guided safaris. I will hear those disguised keywords on the radio and know what we are going to see and assist you in preparing those settings in advance. When you get there, you may not have time for more than a shot or two, and if you are not ready to shoot, you may miss your chance.
- As you approach a sighting, you will have the animals attention more times than not. They will be watching the vehicle as long as it is moving. Now, you will not get a good photo while you are moving. This is why you need to be ready. Settings ready. You are going to have a body jerking motion from the vehicle haulting and then you will be ready to shoot. We are looking to get that moment while the animal is still looking at you to fire off a line of shots. But, they will look away. I promise. Its like a rule or law of nature or something. This also works on departure. The animal will ignore you the entire time, and maybe even physically turn around. As soon as you put your camera down because the animal is never going to look, and the vehicle starts, the creature will look right at you. Until you raise your camera. Then it will look away just to test your patience. Again, not an exact science… but pretty typical in my experience.
- I first set my camera in manual as we leave the car park. In the morning it is still a bit dark so auto ISO is necessary and choose your cap. Mine is usually 6400. I hope to not need it to go there, but I will choose shallow depth of field to gain as much light advantage as possible. I choose a shutter speed to give me a reasonable exposure without overdoing the ISO and to be ready to shoot, albeit not anything with a lot of action. This is a tentative setting because I am not yet at a sighting, but for something stationary – it will do. The moment we arrive at a sighting or anticipate something in particular, I will adjust as needed. If we stop for the sunrise and I want to capture it, I will choose my ISO and readjust that shutter speed accordingly. At this stage of the morning, I will be changing my settings every few minutes because the lighting conditions change this quickly. I want to be as ready as possible because sometimes that leopard walks out of nowhere.
- Do not be afraid to speak up to the guide. There is nothing worse than vehicle positioning to get you close but it puts a patch of grass in front of an animals face. If being further means a better view, let them know. I remember one sighting of my favourite leopard Nzulu where she sat in the bushes with a single strand of grass across the front of her face. Every photo was distracted by this in the worst way, but positioning would never change it. We waited for over a half hour and she finally stood up and started to walk into the clear for me to get great photos! FINALLY! I snapped one photo when the guide started the vehicle and threw it in reverse. Remember rule #1. This image is was the only image I got as a result. The 20 seconds the cat strolled by was the only good photo opportunity and the guide unfortunately cut it 19 seconds short. The intention was to keep us in good view of the cat and in close proximity. But as the only one of the vehicle with the long lens, it was me who was feeling the pain. On Solo Sister Safari – I will be the voice to let the guide know what is okay and what is not. Ultimately, they want you to have the best experience possible. And for photographers, that is precision and sharpness.
 This was my my one second shot.
 - As you approach a sighting, adjust yourself accordingly. Even when a vehicle is stopped, the movement of a group of people shuffling body weight as they ruffle through their camera bags, or turn to face a new direction, will cause your images to not be as sharp as you want. So, being aware of these subtle things can help you and everyone else be more successful in a sighting.
- Choosing a seat. The best seat in the house depends on the sighting. There is no way of knowing. Generally, front row has the least bounce. Back row can see over bushes and is great for animal spotting. Front gives you nicer perspective. Back gives you access to all directions. The guys in the middle compromises on all of these things with some benefits and some sacrifices. Best plan is to rotate fairly. Sit top right, bottom left, then in the middle somewhere. And if you are lucky – you will get gifted something great. I always liked the back because I love spotting animals from there.
- On private reserves you will enjoy some of the game drive in the dark, and if you are lucky, a predator will be found. You can still take some decent photos when a spotlight is used, but it will be touch and go since the light should not be on the face of the animal, but rather the rump or ground beside it. In addition, many guides use a red filter as it has far less impact on the animal and is especially beneficial to the plains game you may pass as you are sweeping the light for eyes. So, my advice – shoot in black and white. If you are in raw – that is fine. You can convert to B&W later. This will make a high contrast but pleasing look. You will never really get great colors shooting under these circumstances. But I still set monochrome because I almost always flip to video because that can make all the difference to documenting a great sighting.
 This was my my one second shot.
Hopefully this helped if you are ever venturing on a safari truck. Most of this information doesn’t apply to regular vehicles and other types of wildlife shooting, but it is still food for thought.
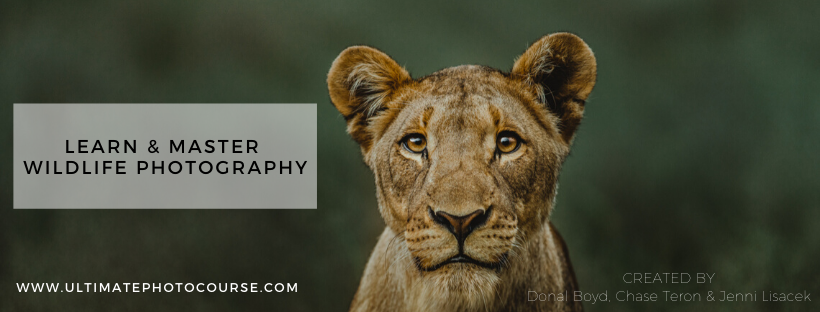
If you feel like you might need some lessons on photographing wildlife in general – and like the leisure of a course – I found one (first one ever) that was filmed in Africa and is extensive in what it covers. With all my experience, I still learned enough to make it well worth it. Check it out!